Proper Use & Care of Microscopes
Oreta Marie Samples, RVT, MPH, DHSc, Fort Valley State University, Fort Valley, Georgia
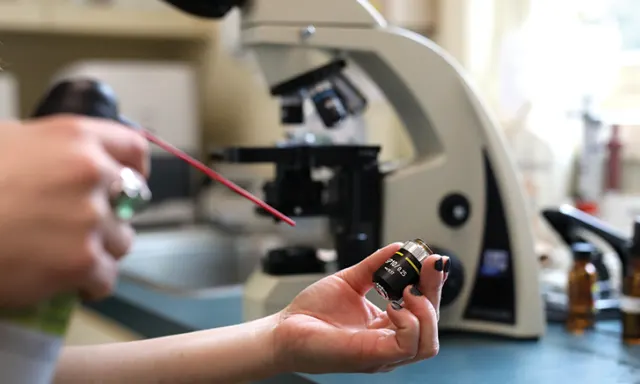
Microscopes are used daily in veterinary practice to view various biologic products (eg, blood, urine, fecal material, fluid aspirates, skin scrapings, ear cerumen). Team members should be familiar with proper techniques for viewing different specimens and the use of each lens objective (eg, 4×, 10×, 40×, 100×). The microscope ocular lenses, objective lenses, stage, and stage clips should be cleaned after each use, and the body of the microscope should be wiped down and inspected at the end of each shift after its last use of the day.
Samples viewed on an improperly cleaned microscope are at risk for contamination, which can lead to erroneous results and misdiagnosis. Because samples may contain transmissible disease organisms, veterinary team members should wear gloves when handling slides, and slides should be disposed of according to practice protocol.
Microscope Basics
Microscopes in veterinary practice typically use 10× ocular lenses with 4×, 10×, 40×, and 100× (oil immersion) objective lenses. Microscopes may have multiple eyepieces to allow more than one team member to view the same slide simultaneously. Objective lenses are housed in a nosepiece that can be rotated to select each lens. Slides are placed on the stage below the objective lens and held in place with metal clips. (See Figure 1.)
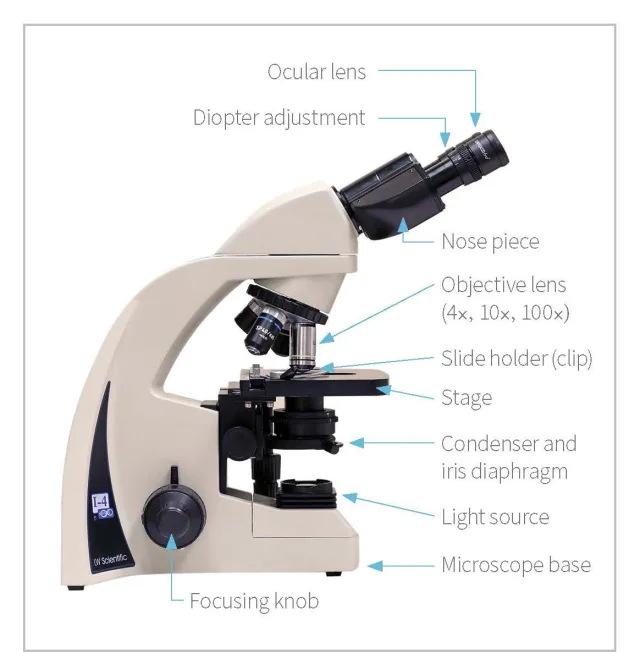
Parts of a microscope
Examination of Samples
Blood, urine, and fecal material are some of the most common substances viewed under the microscope at a veterinary practice. Blood prepared as a smear is stained to view cell morphology. Stained blood smears must be completely dry before examination under oil immersion. Begin by examining cells at 10× and graduate through the objectives, stopping at each to focus using the fine focus dial and light adjustment for sharp results. The iris should be open to allow good lighting of the specimen but may need to be adjusted periodically during scanning. Identifying certain cells at 10× or 40× may be possible, but the 100× oil immersion lens likely will be used to evaluate individual cells. When using a hemocytometer, blood is most often diluted to visualize and count cells manually using 10× or 40×, and light should be adjusted to a lower standard to show contrast between cells and background.
Fecal material is prepared as a coverslipped wet mount and examined for intestinal parasites and ova using a direct smear or concentration (ie, flotation or sedimention) technique. For any preparation, begin at 10×, focus, and then move to 40×. Using the oil objective lens is not necessary.
Urine sediment is prepared as a coverslipped wet mount and examined to identify cells, crystals, casts, parasitic ova, or blood in the same manner as fecal evaluations (10×, 40×). Staining is discouraged because many of the available stains readily grow bacteria and form crystals that can be misleading when evaluating the sediment.1,2
Solid materials (eg, skin scrapings, cerumen) are suspended in a small drop of mineral oil on a slide with a coverslip. The 4× or 10× objectives are used to identify skin or ear mites. Skin and ear cytology preparations to evaluate for bacteria, fungi, and cell morphology should be reviewed using the 10× and 40× objectives.2
Cytologic and microbial samples (eg, vaginal cytology, tissue and bone marrow aspirates, fluid aspirates) can be visualized microscopically for diagnostic purposes similarly to blood smears, beginning at 10× and working toward 100× oil immersion. (See Table 1.)
Sample Requirements for Common Microscopy Samples
10×, 40×
100× (oil)
|
N
N
|
Y
Y
| | Blood, diluted | 10×, 40× |
N
(use a hemocytometer)
| N | | Urine sediment | 10×, 40× | Y | N | | Fecal material | 10×, 40× | Y | N | | Skin scraping |
10×, 40×
| Y | N | | Fluid, bone marrow, and tissue aspirates; ear, skin, and other cytology samples |
10×, 40×
100× (oil)
|
N
N
|
Y
Y
| | Vaginal cytology | 10×, 40× | Y or N, | Y or N, |
,Vaginal cytology slides can be viewed after drying/fixation, after air-drying/staining and nonfixed, or examined as a stained and coverslipped wet mount.2
Cleaning the Microscope
The ocular lens, objective lenses, stage, and stage clips should be cleaned after every slide, and the entire microscope should be thoroughly examined and cleaned at the end of the day or at the beginning or end of each shift. Storing all the necessary cleaning supplies in one central location near the microscope helps ensure that cleaning is completed as scheduled.
Microscope Supplies
The following are suggested cleaning supplies for daily microscope care.
Cotton tip applicator
Distilled water
Suction bulb or ear balloon
Kimwipes or lens tissue
Microfiber or other soft cloth
Optical cleaning solutions
Soft brush
Start by inspecting the cord for frayed wires or damage. A damaged microscope should be removed from service immediately to prevent injury to team members. To gain access to the objectives for cleaning, lower the stage or raise the arm, depending on the type of microscope being used. Moisten cotton tip applicators with the appropriate cleaning solution and gently clean each objective lens and wipe dry with new lens paper.<sup1,3 sup>
Use distilled water to remove water-soluble debris from the microscope lenses and body, and dry with lens paper.1,3 Use a solvent such as blue Windex or xylol for nonwater-soluble material.3 (See Table 2.) Wipe the eyepiece(s) with Kimwipes or lens paper moistened, not soaked, in 70% ethanol before drying.1,3,4 Use a suction bulb to remove any hair or fibers to prevent scratching.
Cleaners Recommended for Microscopes
,Carcinogenic—use gloves and avoid breathing fumes.
Look through the eyepiece(s) and rotate each one to ensure that no debris remains on the ocular lens. If it is necessary to remove the eyepiece to clean the inner glass surface, never “probe” into the tube housing; instead, place a lens cap or piece of aluminum foil over the opening while cleaning the eyepiece.5
When working with Fecasol, sugar, or other fecal floatation solutions, the microscope stage, clips, and other areas that may be splashed with solution should be cleaned with a water-moistened Kimwipe to prevent the residue from attracting pests and dust. After saturated sodium chloride is used, take care to clean the microscope because this substance will corrode and damage metal.
Wipe the entire microscope body, including the light source, with a warm, moist microfiber cloth. Center the 4× objective over the stage, turn the power off, ensure it is dry, and drape the dust cover over the microscope.
Microscopes should be serviced annually by a professional microscopy service, and lenses and bulbs should be replaced as needed.
Conclusion
All veterinary team members responsible for preparing and viewing microscopy samples should be familiar with the different components of the microscope and the viewing requirements for each biologic substance. A well-maintained microscope ensures that samples are free from contamination and results are accurate. Daily cleaning and maintenance also protect the practice’s investment in this valuable resource.