Diagnostic Blood Smear Preparation
Barbie Papajeski, MS, LVT, RLATG, VTS (Clinical Pathology), Murray State University, Hutson School of Agriculture, Murray, Kentucky
The American Veterinary Medical Association Committee on Veterinary Technician Education and Activities mandates that all veterinary nurses must master blood smear preparation as part of their school curriculum.1 Throughout their career, veterinary nurses must maintain this critical skill to ensure consistently accurate laboratory results. All practices should incorporate blood smear preparation and evaluation in routine standard operating procedures as part of the complete blood count and in quality control measures that verify automated results.2–4
A blood smear provides a snapshot in time of a patient’s blood cells that may be referenced later if repeat laboratory work or a diagnosis clarification is necessary. Materials are inexpensive and easily obtained, and a skilled veterinary nurse can prepare and evaluate slides in just a few minutes.3,5
Collection & Supplies
Patients must be calm at the time of collection to avoid undesired changes in hemograms (eg, excitement or fear can result in temporary leukocytosis).5 Use the largest vein and needle size possible for the specific species to reduce hemolysis and crenation. Jugular venipuncture is appropriate in most patients.6
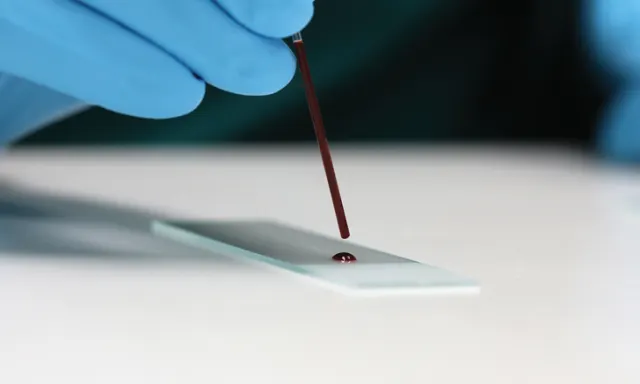
Prepare blood smears immediately after blood collection. Gather the necessary supplies (ie, anticoagulant tubes, glass slides, capillary tubes, stains) in advance to avoid delays. (See Figure 1.) Whole blood typically is collected in EDTA tubes for mammals and in lithium heparin tubes for nonmammals. A drop also can be taken from a collection needle or site immediately after venipuncture. Tubes must be filled according to the specific tube manufacturer’s recommended fill volumes to prevent size distortion of cells and clotting of samples. Underfilled tubes will cause cells to shrink, leading to crenation. Overfilled tubes will not contain enough anticoagulant to prevent clotting. Delaying blood smear preparation will lead to changes in cellular morphology (eg, nuclei pyknosis, hypersegmentation, nuclear indention, vacuole formation, detachment of epicellular parasites or bacteria, clumped platelets).2-6
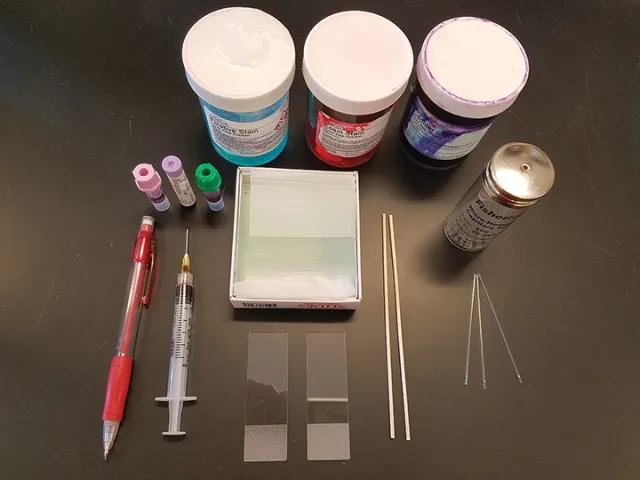
The materials needed to create a blood smear include a pencil for labeling, needle hub or blood tubes, glass slides, capillary tubes or wooden applicator sticks, and stains. Figures courtesy of Barbie Papajeski, MS, LVT, RLATG, VTS (Clinical Pathology)
Glass slides for blood film preparation should be new or pre-cleaned and of high quality, and have a frosted edge for labeling. Previously used or washed slides may be contaminated with residual detergents or microscopic debris that can appear as artifacts in the blood smear. Beveled slides prevent blood from spilling over the edges and enhance production of a high-quality smear.
Keep slides clean by storing them in original packages and handling them only by the edges. Avoid touching the area where blood will be placed and spread. Fingerprints, oil, water, and detergents will cause holes to form within the blood smear.2
Creating High-Quality Smears
Most blood smears are prepared in veterinary practices using the wedge technique, which is sometimes called direct slide or slide-over-slide technique, using the following steps2,5,6:
Place a small drop of blood close to the frosted edge of the slide. Blood dropped from a wooden applicator stick, the hub of a needle, or a plain capillary tube approximately half-filled with blood should result in an adequately sized blood drop (ie, no more than 3 mm in diameter). Gently transfer the drop by capillary action or allow it to free fall onto the slide to avoid cell damage. Untreated blood from a needle hub must be transferred quickly to avoid micro-clot formation.
Position a second, or top, slide at a 30-degree angle in front of the blood drop on the first slide (see Figure 2) and then pull the top slide back into the blood drop just enough for capillary action to spread the blood laterally to within ≈1 mm of each slide edge.
Push the top slide forward, without adding top pressure, while maintaining even contact with the bottom slide. The goal is to create a smear that starts with the blood drop, followed by the body of the smear (ie, the thickest area), a monolayer of cells, and the feathered edge (ie, the thinnest area) that, when stained, can be evaluated microscopically to determine the types and numbers of cells present, cell morphologies, individual cell components, and any blood cell abnormalities.
An ideal blood smear has a rainbow appearance when held to the light (see Figure 3), with a gradual transition from the thicker areas beginning at the original blood drop, to the monolayer, to the thinner, feathered edge. Slides of diagnostic value have an even monolayer and the entire smear stretches at least half the slide length, with the sides extending nearly to the slide edges. (See Figure 4.) Feathered edges have a smooth appearance without streaks.2,3,5,6
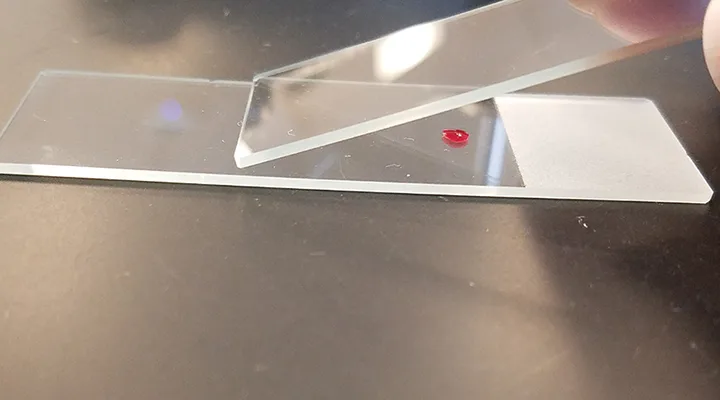
FIGURE 2
After placing the blood drop on the slide, position a second slide in front of the blood drop at a 30-degree angle.
Allow the blood smear to air dry completely before staining and label immediately to avoid any mix-up. Slides are stained using a variation of Romanowsky-type stains. Most stains available to veterinary practices are quick stains, which provide similar staining to Wright’s and Wright- Giemsa stains. Follow the manufacturer’s protocol to ensure consistent results and produce optimal staining of cell components. Examine each part of the blood smear under the microscope. Start with the 10× objective and perform a quick scan of the body for rouleaux formation and red blood cell agglutination. Examine the monolayer to estimate white blood cell and platelet counts. Identify microfilariae, atypical cells, and platelet clumps by examining the feathered edge. White blood cell estimates may also be obtained using the 40× objective. Change the objective to 100× and evaluate the red blood cell, white blood cell, and platelet morphologies.2,3,5,6
Tips & Troubleshooting
The creation of a high-quality blood smear is affected by the drop size, angle of the spreader slide, and speed at which the spreader slide is moved. For example, if the blood drop is too large, the resulting smear will be too thick to create a monolayer of cells and may extend off the slide edges. (See Figure 5.) If the drop is too small, the smear may be too thin, resulting in a monolayer of cells spread too widely apart to have diagnostic value. (See Table: Common Problems, Causes, & Solutions.)
Common Problems, Causes, & Solutions2-7
The angle of the spreader slide determines how much blood is moved forward and may need to be increased (ie, to an angle more than 30 degrees) for samples with low PCV (eg, anemia) to carry less blood and create a thicker, shorter smear, and decreased (ie, to an angle less than 30 degrees) for samples with high PCV (eg, dehydration, polycythemia) to carry more blood and produce a thinner, longer smear.7
An angle between 30 and 45 degrees is appropriate for most samples with a typical packed cell volume for the species.2,5,6 The speed at which the spreader slide is moved affects the amount of blood that remains behind the slide. Moving the spreader slide too fast can create a shorter or thinner smear; moving it too slowly may result in a thicker or longer smear.2,5-7
Conclusion
Veterinary nurses must be skilled at preparing and evaluating blood smears to ensure results accurately reflect a patient’s current health.4 Maintaining this skill takes practice but should be achievable once a veterinary nurse understands how each step in the process affects the blood smear produced.